


 I see these fun pacifier clips being sold everywhere, especially at cute baby boutiques. It’s super easy to make one yourself with just a few materials and a sewing machine. This is also a perfect beginner project if you’re just learning how to sew.
This is such a quick project that you’ll make yourself one and go on to make a few more to all of your friends too. At least, that’s what I did. This pink clip was gifted to my friend who is due with a baby girl very soon.
Step One:
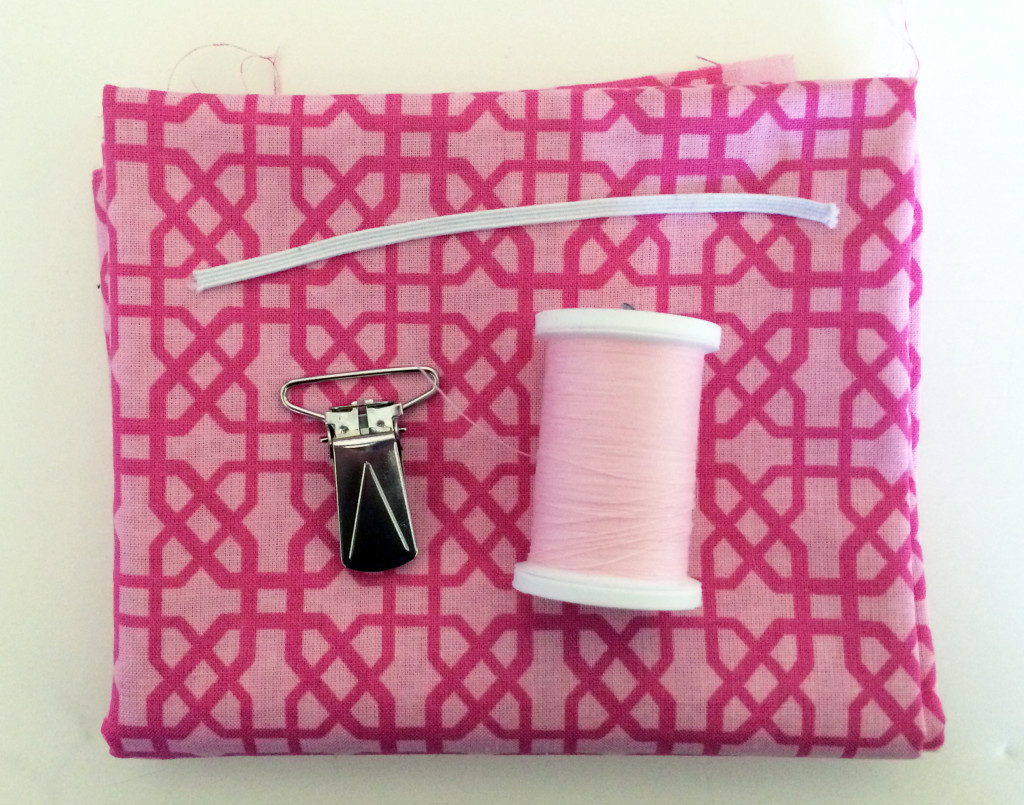 Gather your materials. You will need a piece of fabric that you like, coordinating thread, a 5″ piece of elastic, and a metal suspender clip. I found a set of two suspender clips at Joann Fabrics in their “notions” section for around $3. You can also search Etsy’s supplies section for “pacifier clips” or “suspender clips.”
Step Two:

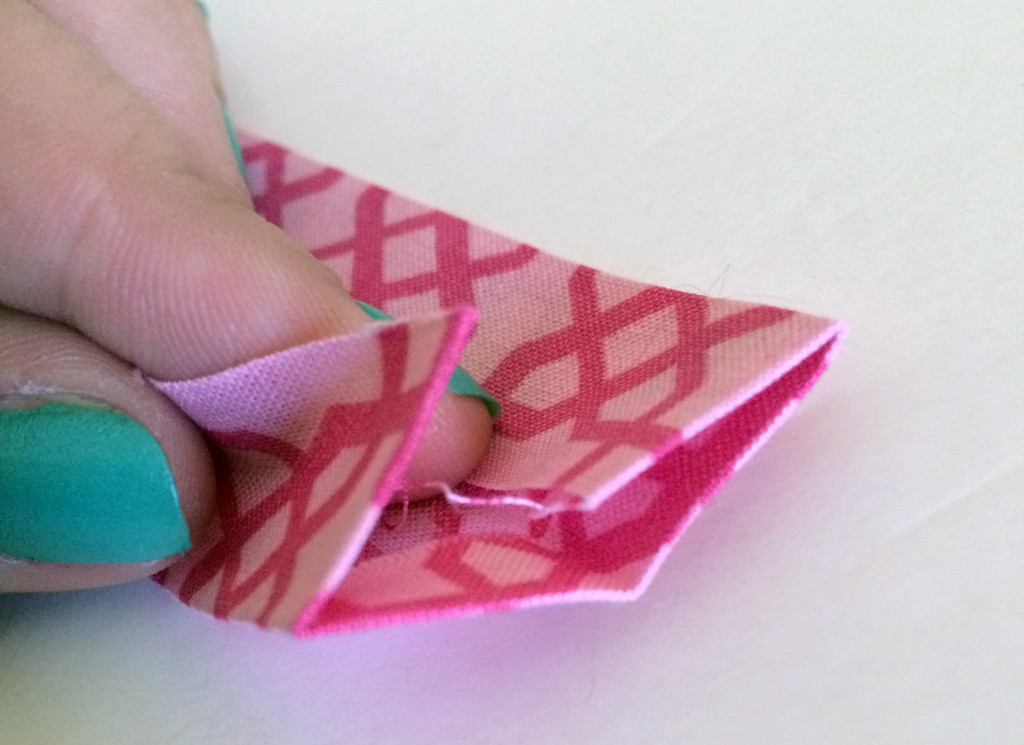
To get started, cut your fabric into a 12″ x 5″ strip and iron a 1/2″ seam at each short edge. Next, iron your strip into quarters, as shown above. If you’ve ever sewn bias tape, this is very similar. You want no raw edges to be exposed when your strip is all folded together.
Step Three:
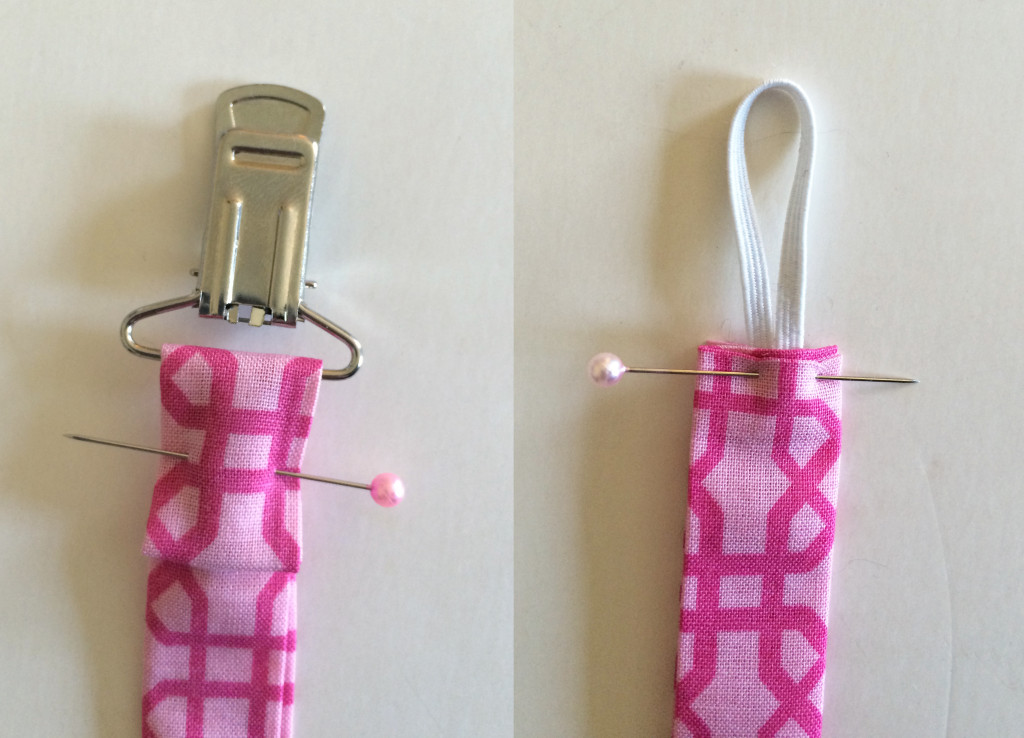 Next, fold over the strip of fabric into your suspender clip as shown above and pin in place. Insert the elastic into a loop on the other end and pin in place.
Step Four:
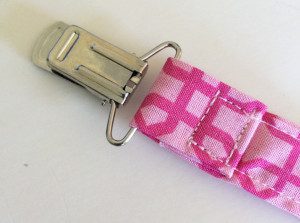

Sew all the way around your strip of fabric, securing the end with the suspender clip with more stitching like you see in the photo. I also back stitched across the elastic edge for added durability.
Step Five:
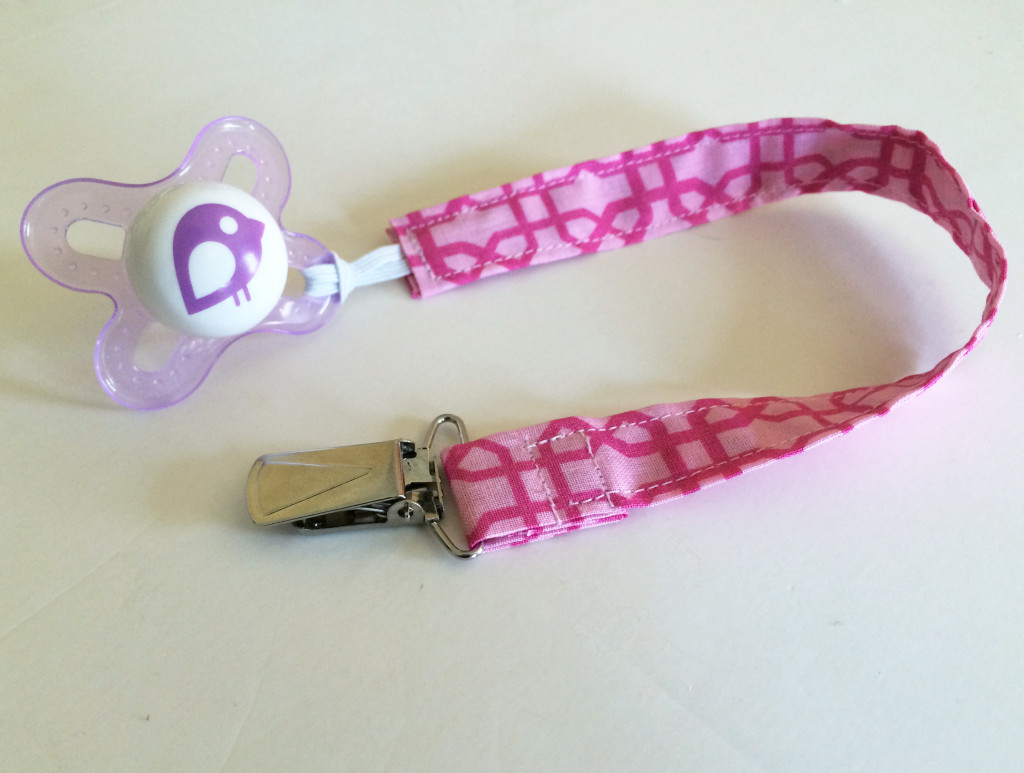 Once you’ve stitched all the way around the fabric, you’re done! Loop your baby’s pacifier through the elastic and clip the other end to your baby’s shirt.


